DIY Bookmarks

I love to read. It's one of my very favorite things to do. In fact, I read far more than I watch TV. I'm one of those weirdos who hardly watches TV at all, actually.
When I read, I tend to just grab a scrap piece of paper to use as a bookmark, and if there's no paper in sight I'll just "dog ear" the page by turning the corner down.
I finally decided enough is enough of all this ugly bookmarking. I'm so tired of looking at ugly scrap pieces of paper in my books! So I made some cute bookmarks that I can start using. They've turned out SO cute and I'm so excited to share them with you!
Below I'll give some helpful information to tell you how I very quickly and easily made my bookmarks. Let's start with the paper that I used.
PAPER:
I bought this adorable paper, which is a double sided paper so you have really pretty, coordinating patterns on the front and back of your bookmarks. This is much more appealing than a bookmark with a blank white back side.
Another thing I loved about these paper packs is they are the perfect size for bookmarks. The paper pad contains 6"x6" square paper sheets, so all you have to do is make one cut to get it just the right size for bookmarks. I made mine 2.25" wide x 6" high.

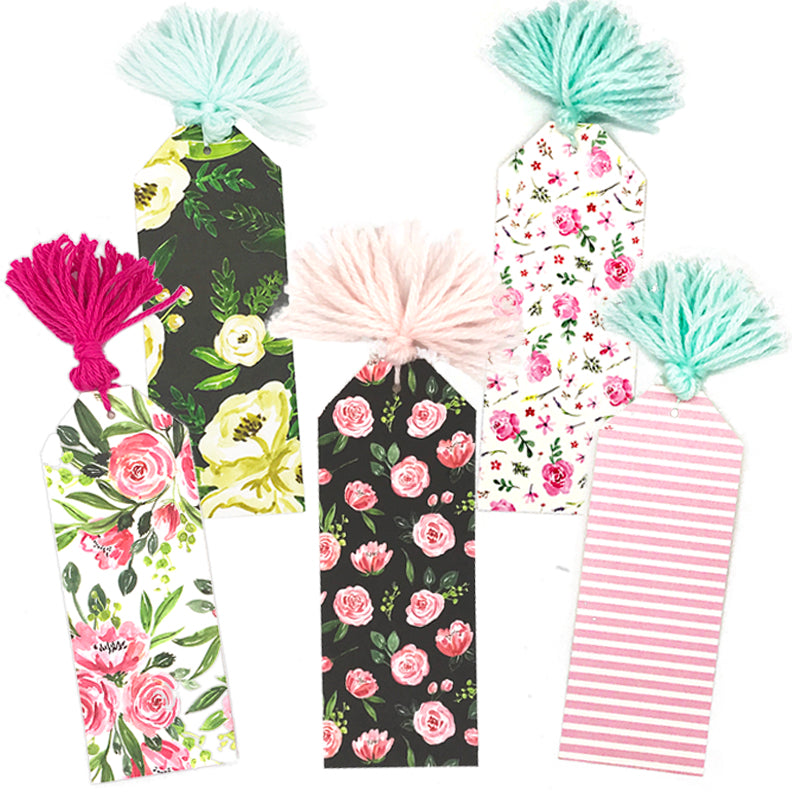
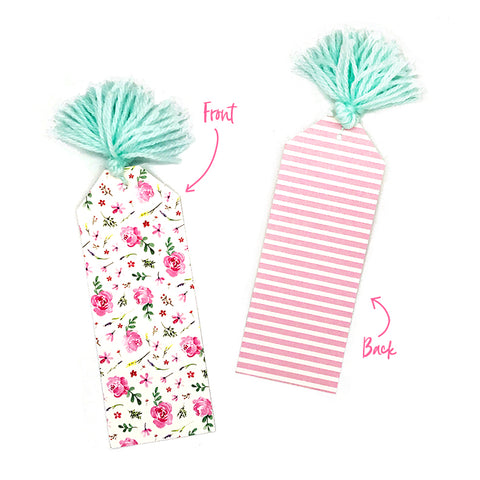
So here's how a few of my bookmarks turned out. You can see how the paper is double sided so you get nice, coordinating patterns on the front and back. So beautiful.
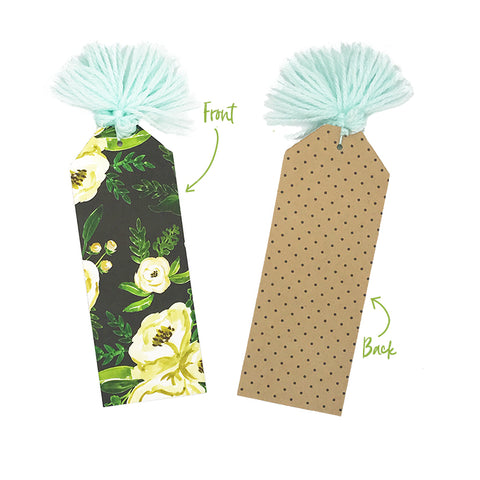
Here's another one of my favorites, showing the front and back:

And here's just one more that I love which really shows off this beautiful paper pack:
I'm really happy with this paper selection, but there are lots of other patterns you can choose from like Flower Market Paper Pack, this really cute Travel Themed Paper Pack, and this Spring Themed Paper Pack. I really love the Carta Bella paper designer and the fact that these 6x6 packs are double sided and the exact right size, makes this paper super easy to use for bookmarks.


I did not laminate mine, but if you decide you want to laminate them, that might be a good idea so they will hold up for longer. If you need a good laminator, this laminator is excellent and these are the laminating sheets I use.
CUTTING YOUR PAPER:
As mentioned above, this 6"x6" paper size is perfect and only requires one single cut to get your bookmarks just the perfect size. I cut mine down to about 2.25" wide and kept the height at 6" high.
For super easy measuring and cutting, I use this paper cutter. It cuts accurately and includes a ruler printed on the base for easy measuring. I've been using it for about 10 years now and the blade is still working perfectly. I'm extremely satisfied with it....just thought I'd share that in case you're looking for a good paper cutter for your DIY projects.
CORNER EDGING:
So, once you've picked out the paper you like the best, the next step is to edge the corners. You can see in my photographs of the bookmarks I made how the top 2 corners are trimmed off to add an extra detail. The easiest way I've found to do this, is to use this Tag Punch Board - it's extremely easy to use and always cuts your corners exactly the same size every time and it also helps you very easily punch a center hole in the perfect spot, without having to measure. I used the "H" marker on the tag punch board to get the angle shown on my bookmarks.

TASSELS:
The last step is to make the tassels, which is easier than you'd think it would be when you use this super easy to use Tassel Loom which is also made by the same company as the Tag Punch Board. I love this company. They make really fantastic products.

When I purchased this Tassel Loom, I was a little bit worried about how it was actually going to work. I thought it was going to be difficult to do, but I was willing to give it a try. It actually turned out to be an extremely simple process that took about 5 minutes per tassel. You can use yarn, thread, ribbon, or any other flexible material. I really LOVE this product.
After making my own tassels for the first time I learned a few things. Here are a few tips:
- When you finish making your tassel, there will be a little piece of yarn that you will use to tie the tassel onto your bookmark. Just be sure to tie that on nice and snug, or your tassel will be a little too loosy-goosy on your bookmark. You want it to kind of snugly hold on to the top of your bookmark.
- I found yarn was easiest to use. I used 2 brands of yarn - one was a baby soft brand and while the tassels turned out gorgeous with that yarn, it was slightly more difficult to make the tassels with the extremely soft yarn because it tends to unravel more easily.
- For my tassels, I used this yarn for the hot pink tassels, and I used this yarn for the light pink and aqua tassels.
- There are 3 tassel sizes you can make with the loom. I used the smallest size for the bookmarks.
- The Sugar N Cream yarn brand was the easiest to work with and was slightly thicker than the other brand. Because it is a little thicker than the Patons brand, I wrapped the Sugar N Cream yarn around my loom about 12 times to make the hot pink tassels. The Patons Baby Soft Yarn is a thinner yarn so I wrapped that one around the loom about 20 times.

SHARE IT!
If you like this post and want to help support this website so that we can provide more freebies like this, please share it on social media or pin it on Pinterest! We would greatly appreciate the share!
FOLLOW US!
To stay up to date on tons of free giveaways, follow us on Pinterest, Facebook, or Instagram!
For personal use only. Using this design for resale or providing it as a download on another website, or any other commercial use in any way is prohibited.
This post contains affiliate links which help support this website and make it possible for us to provide free printables.
Thank you for your support!